Overview
Android phones safeguard data and privacy by implementing a Google verification lock when you initiate a factory reset. To bypass this lock, you need to input your Google account details. If you've forgotten your Google password linked to the phone, accessing the phone becomes impossible unless you use EelPhone Google Account Removal to bypass the Google account verification without a password.
Upon acquiring a new Android phone, you're required to input your Google account details if you wish to download apps from Google Play. Consequently, setting up a Google account for your new Android phone becomes necessary. This account serves as your phone's ID and password. For Android 5.1 and later versions, the Find My Device feature is activated automatically (though it can be deactivated manually) to enhance the safety of users.
A factory reset on an Android phone, when the Find My Device feature is active, prompts you to input your Google account details to bypass the Google verification. This extra layer of security helps protect your data and prevents unauthorized use of your phone. If you own the phone or have access to the Google account details from the owner, you can directly remove the Google account verification. However, if you do not have the Google account details or have forgotten them, you can use the EelPhone Google Account Removal tool to unlock the Google verification lock post-reset without a password.
- Section 1: How to Bypass Google Verification Without Password Post-Reset
- Section 2: How to Bypass Google Account Verification on Android for Free
Section 1: How to Bypass Google Verification Without Password Post-Reset
For Android phones running version 5.1 or later, setting up a Google account is necessary, and the Find My Device feature is activated automatically. A factory reset doesn't unlock a locked Android phone; instead, it locks the phone via Google account, requiring you to input the Google account details to start the phone. If you don't have the phone's Google account details, use a tool to remove the Google account verification lock without the Gmail account and password.
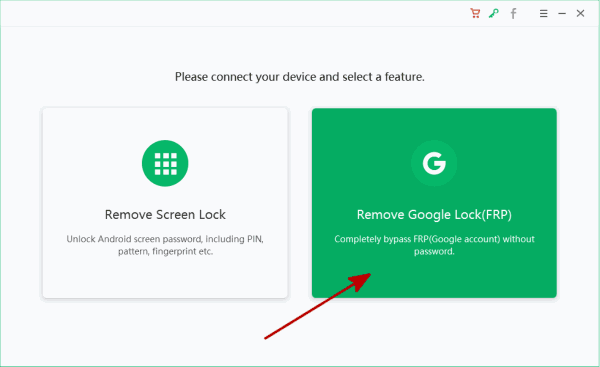
Step 1: Download and install the EelPhone Google Account Removal tool on your Windows system. Launch the tool after installation, and on its homepage, select Remove Google Lock instead of Remove Screen Lock.
Step 2: Connect the Android phone, locked by Google account verification, to your computer using a USB cable. On the tool's page, carefully read the warning before proceeding to remove the Google account verification from the Android phone. Make sure only one phone is connected to the computer and that you have a stable Wi-Fi connection for downloading the apk file in the next step. Click on Next to proceed with bypassing the Google account verification without a password.
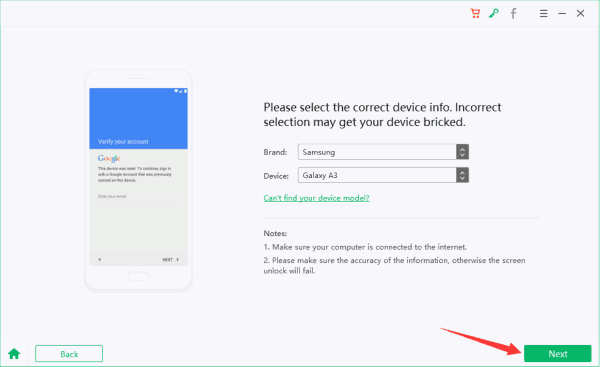
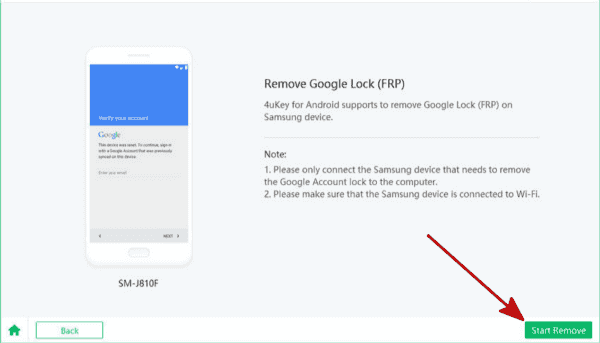
Step 3: Based on your Android phone, select the appropriate phone brand and device version from the scan result. The tool will automatically display the detailed model information. Then, click on the Start Remove button.
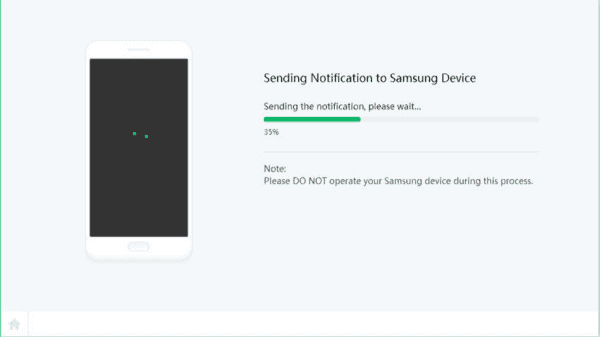
Step 4: Once started, the tool will immediately send a notification to your phone. Ensure you maintain a connection during the process.
Step 5: When your phone successfully receives the instruction, a window will pop up on the phone. Tap on View to open the URL, and download the apk file by clicking on the Download button.
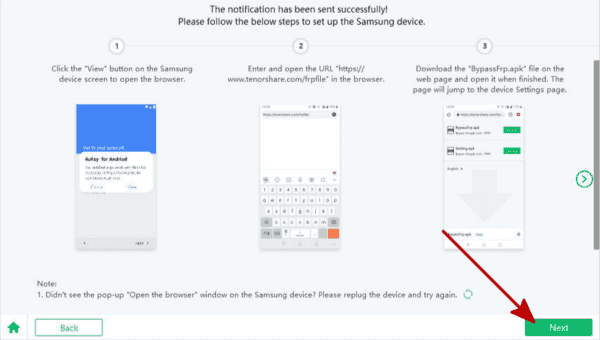
Step 6: After successfully downloading and installing the apk file on the phone, follow the steps displayed on the tool interface to enable the PIN windows feature from settings.
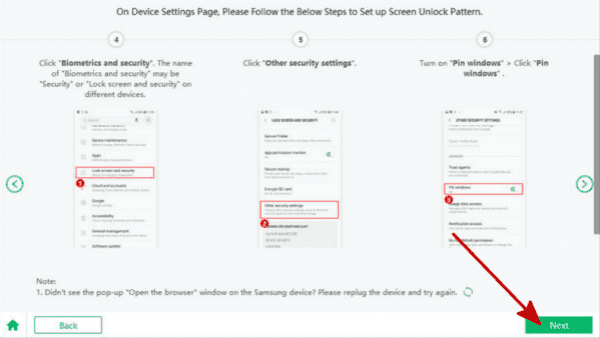
Step 7: The guide will assist you in setting up a new pattern for the Google verification locked phone. After restarting the phone, you can use the new pattern to bypass Google verification and access your Android phone.
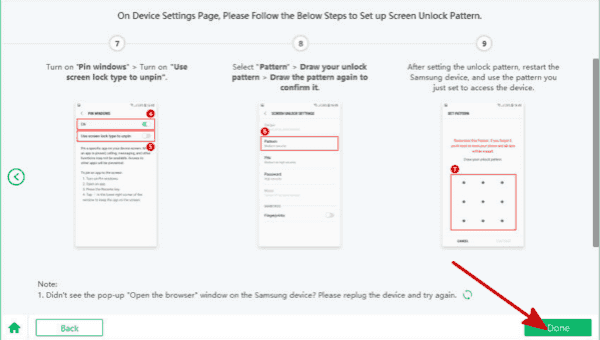
Step 8: Use the newly created pattern to bypass Google verification. This method gives you access to the Android system engineer's authority and is the most up-to-date approach.
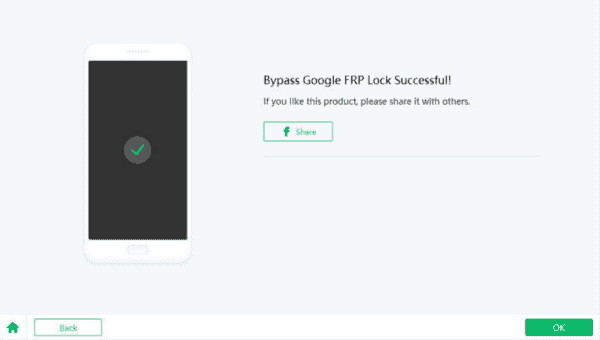
This guide thoroughly explains how to bypass Google account verification on Android without a Google account.
Part 2: How to Bypass Google Account Verification on Android for Free
Adding a Google Account to an Android phone
To add a Google account to your Android phone, navigate to Settings, click on the Account feature, and then on Google. Enter a Gmail address that you've registered and its password, ensuring you remember the password.
Settings>Account>Add Account>Google>More option>Create account, the account created here is the Google account you need to enter for verification after a factory reset of your Android phone.
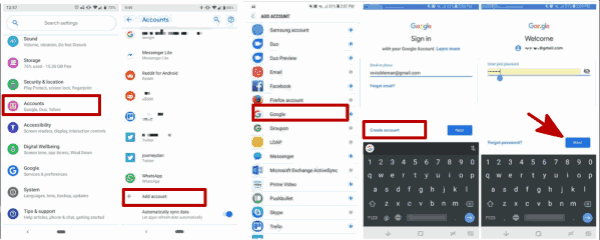
Note: You can add several Gmail accounts to your Android phone, but only one can be used as the device ID. If you only want to add one Gmail to the Android phone, follow this path: Settings>Account>Add Account>Google, enter the Gmail account, and click on Next rather than More Option. After Android 5.1 version, the 'Find My Device' feature will be turned on automatically once you add the Google account to the Android phone.
Removing a Google Account from an Android Phone
Before selling your Android phone, you should remove your Google account from it. When you do this, all data associated with that Google account will be erased from the phone.
Go to Settings>Account, tap on the Google account, then click on 'Remove Account' from Android phone. Importantly, you'll need to enter the account password to confirm the bypass of Google account verification. If you forgot your Google account password, you can bypass Google account verification without a password with the help of the tool from the first part.
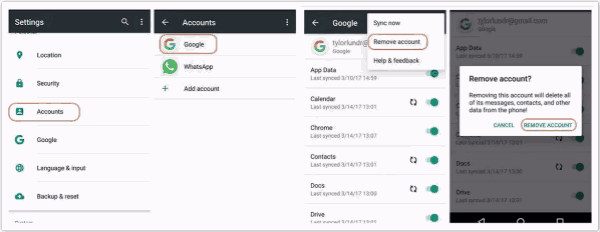
So when you're stuck on the verification screen of an Android phone, just enter your Gmail account and password to remove Google account verification. If you don't have the password, refer to the first part of this guide to bypass Google account verification.
By following these steps, you can successfully bypass the Google account verification on your Android device. Remember to always keep your Google account details safe and accessible to avoid such issues in the future. If you're planning to sell or give away your phone, be sure to remove all personal accounts and data for your privacy and security.
Alex Scott
This article was updated on 17 May, 2023

Likes
 Thank you for your feedback!


