Summary
When you're using Windows, if you want to remove activation lock from iDevice, you should jailbreak iOS device manually so that you can use EelPhone Activation Lock Removal to bypass iDevice activation lock on Windows.
You know that if you use EelPhone activation lock on mac, the removal will jailbreak iDevice automatically, but if your computer is Windows, you should follow the steps below to jailbreak iDevice manually.
- Part 1: What to Do When You Jailbreak iOS Device(All iOS Version)
- Part 2: Detailed Guide to Jailbreak iOS Device on Windows.
Part 1: What to Do When You Jailbreak iOS Device(All iOS Version)
Before jailbreaking iDevice on Windows, you should take some preparations so that you can jailbreak iDevice with success on Windows.
The steps below works on Windows 7 or later, 32 or 64 bits.
Prepare one USB flash drive with 2GB or more capacity.
You should download two documents on Windows in advance:
checkn1x-1.0.6-amd64.iso
rufus-3.1.1.exe
You should install the second document after downloaded.
When all is ready, it's time to jailbreak iOS device on Windows, it's better to take one phone to see the detailed steps.
Part 2: Detailed Guide to Jailbreak iOS Device on Windows.
After having downloaded the document from below, it's time to jailbreak iOS device on Windows.
Step 1: Take out the USB flash drive, burn the checkn1x iso document to the USB flash drive.
1. Plug the USB flash drive to the Windows USB port
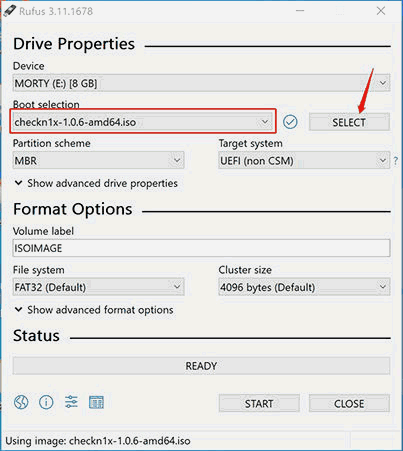
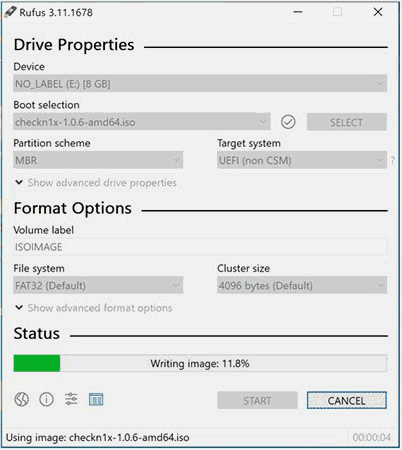
2. Open rufus app on Windows you have downloaded, from the home page of rufus, click on Select button to find out the checkn1x file from Windows. Don't change other settings and click on Start button to go on.
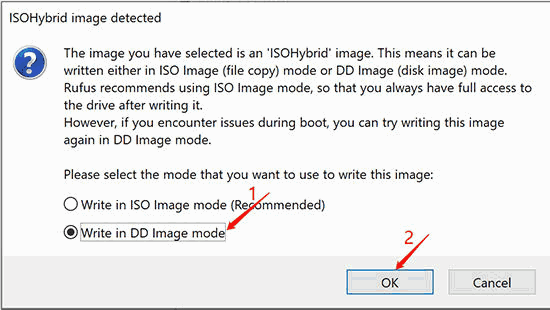
3. After then pops one notice, choose “Write in DD Image mode ”, click on OK to confirm the choice.
4. It's time to burn checkn1x iso file to USB flash drive, just wait and don't close the page.
5. Click on Close button when the burning process finished.
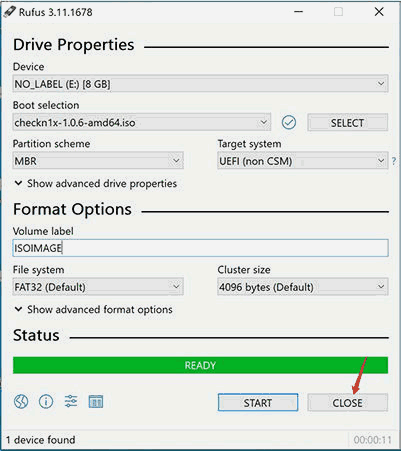
Note: When the checkn1x iso file have been burned to the USB flash drive with success, unplug and then replug the USB flash drive to Windows one more time to make sure that the USB flash drive can be detected by Windows after burning.
Step 2: Start to Jailbreak iOS Device on Windows
All is the preparation for jailbreaking iOS device, now you should follow the guide below carefully.
1. Restart Windows
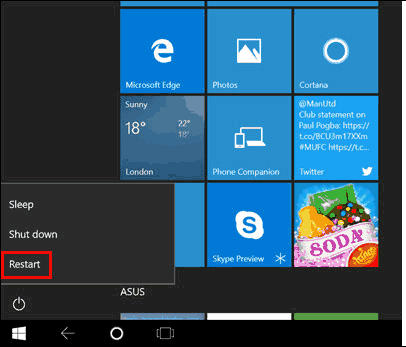
Go to the bottom left on the Windows, click on Restart button to restart you Windows.
Press on the boot key-f12 when the Windows was powered on but is loading to the main page of Windows.
Note: most of Windows computer root key is f12, but if your can't get into boot page, search online to get the boot option key on your computer.
2. Select Boot Device
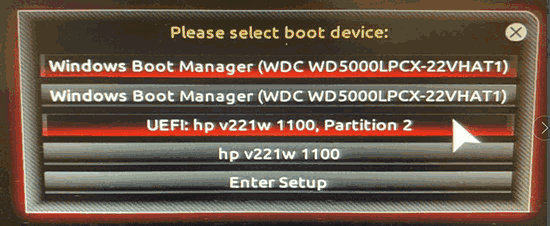
From the popping page, choose the USB flash drive as the boot device.
3. Connect the iOS Device
Once you have selected the USB flash drive as the boot drive, it's time to plug your iOS device to computer via USB cable. Once your iOS device was connected to the checkn1x tool with success, you can find out your iOS device model information from the main page of checkn1x. click on Start button then.
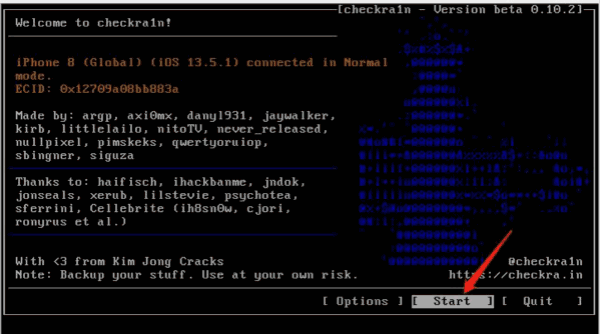
4. Put iOS Device Into DFU Mode
If you want to jailbreak iDevice on Windows, checkn1x requires that the iDevice in DFU mode so that the checkn1x can jailbreak iDevice. Click on Next button to put iDevice into DFU mode manually.
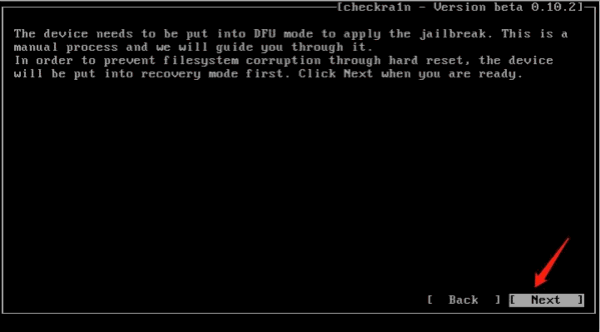
5. But before putting iDevice into DFU mode, the checkn1x will put iDevice into recovery mode automatically.
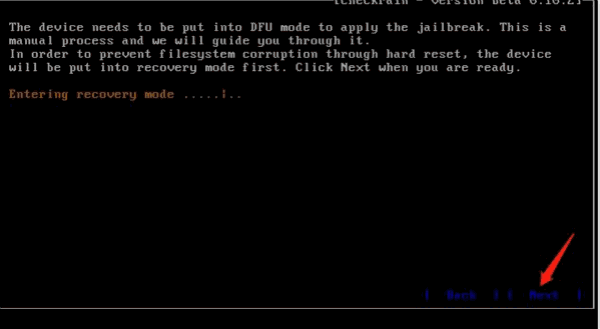
6. Click on Next button to present the window of steps to put iDevice into DFU mode.
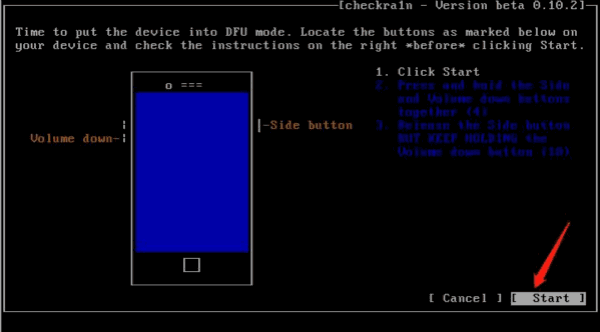
7. Once your iDevice got into DFU mode, the checkn1x will jailbreak iOS device automatically, during the jailbreak process, just keep connection. When the process finished, click on Done button.
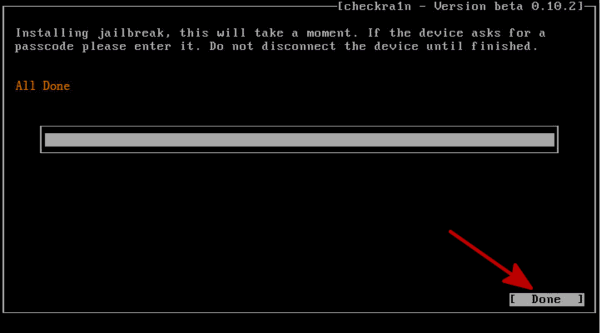
Note: During the jailbreak process, if your iDevice stuck or failed to jailbreak, please change the USB flash drive and try again, or restart your iDevice and try again.
Note: EelPhone Activation Lock Removal is one tool which can jailbreak iPhone automatically, so when you feel it's difficult to jailbreak by yourself, you can use the tool to jailbreak iPhone.
Alex Scott
This article was updated on 27 January, 2021

Likes
 Thank you for your feedback!